3g alternator conversion
swapping a 1g or 2g alternator for a 3g alternator
By Michael Shumack:
- What’s the difference?
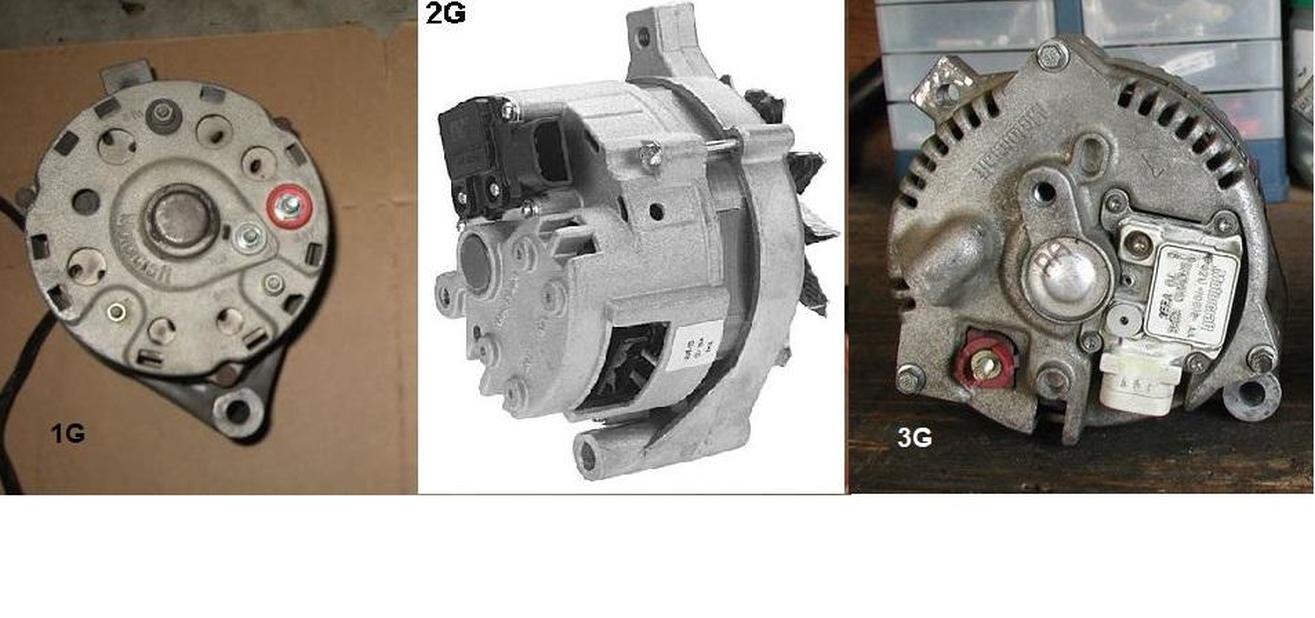
In 1986 Ford started using the 2G (2nd Generation) alternator on the trucks. Ford replaced the 1G's external regulator in favor of the compact internal regulator design. However, the 2G series alternator, has largely been considered the bad apple of the bunch. The flaw was in the power output plug and a weak bridge rectifier. The plastic power plugs used blade type terminals which would lose connection and occasionally melt, short, and possibly cause under-hood fires. In 1996 Ford publicly recognized the fire hazard caused by the 2G alternator and released TSB 96-21-4.
Fords 3G alternator was a giant leap in technology and quality. Ford trucks starting using the 3G in the 1992 F-150. The 3G was internally regulated, used two internal cooling fans, sealed bearings, and had a superior battery stud. The 3G’s were more efficient, and produced more amperage at idle than any of its predecessors.
- Why Not?
- My electrical load is small (nothing added) so 45 or 60 amps is all I need.
- I have an Ammeter in the dash, I don’t want to lose that.
- I want to do this swap, how do I start?
- 90 Amp (small case) or 130 Amp (large case). And aftermarket units up to 200A.
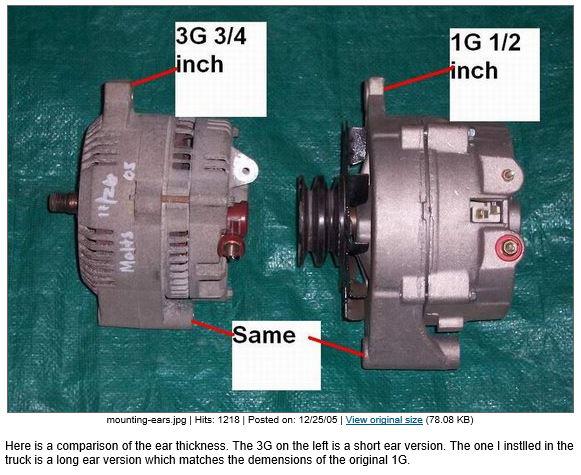
- Mounting ear locations (you need the mounts 180 degrees apart. 12 o’clock and 6 o’clock).
- There are two mounting ear lengths 7” hole-to-hole, and 8.25” hole-to-hole. The one you need depends on whether your stock belt setup is V-belt or Serpentine.
Vehicles that are donors:
90-99 Taurus/Sable (the 3.8L has 8.125” mounting. 3.0L has the 7” mount spacing) *Need to confirm this info.
91-96 Lincoln V6
94-95 Mustang 5.0L
94-00 Mustang V6
95-96 Windstar V6
94-96 Thunderbird/Cougar 3.8L
92-96 F-Series and E-Series
- Which one – the 90A or 130A (or something bigger)?
But keep in mind, a single V-belt drive can only support up to 100A before the belt slips. A double v-belt or serpentine belt can support up to a 180A alternator. So if you go too large on the alternator output, you many need to improve your belt drive setup too.
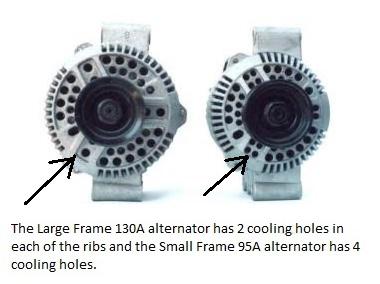
How to tell if it’s a 90A or 130A: The number of cooling holes in the front that are in the three “ribbed” sections. Two holes is the 130A and four holes is the 90A,
* Trucks that currently have V-Belts use the 8.25” mounts, and trucks that have serpentine belts use the 7” mount spacing. (* Need to verify this info).


There is not much reason to go with the smaller 90A model, except that in some cases the larger frame 130A model may require some “clearanceing” of the serpentine (aluminum) mounting bracket. If you don’t want to grind on your mounting bracket and 90A is all you need, then go with the smaller case alternator.
|
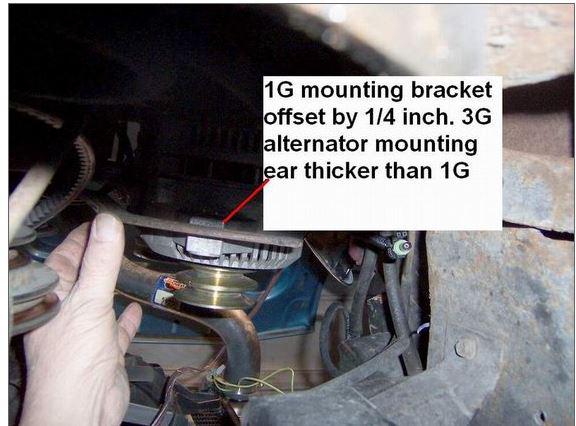
Also on a 1G to 3G swap, you may need to modify the tension-adjustment bracket for the V-Belt setups. The current bracket has a slight “offset” or jog to it. The bracket can easily be removed and “flattened” so that it fits behind the mounting ear.
  |
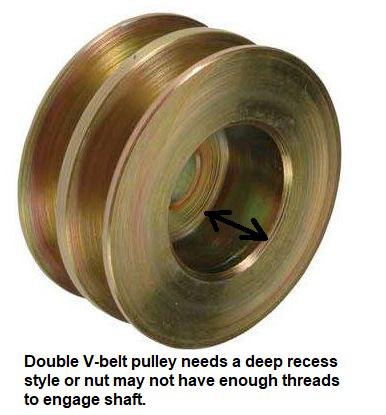
The pulleys can be swapped from 1G or 2G to a 3G. Putting a V-belt pulley on a 3G that has a serpentine belt pulley requires a small-thin shim under the pulley to keep V-pulley from rubbing on the 3G case.
- Electrical:
- New cable from starter solenoid (or battery) to alternator. Either 4GA or 2GA. I think 4GA is fine for either size alternator, but you can go with the larger 2GA if you want (note that the thicker 2GA cable is stiffer and harder to route).
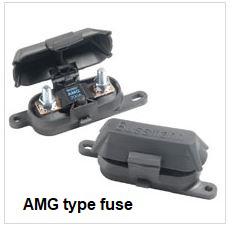
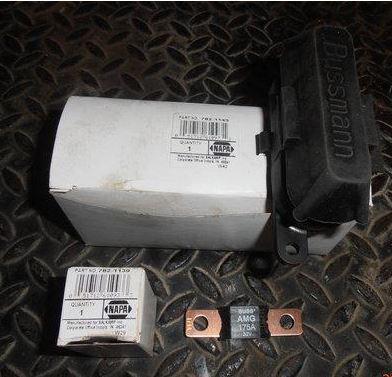
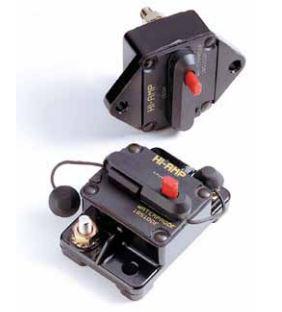
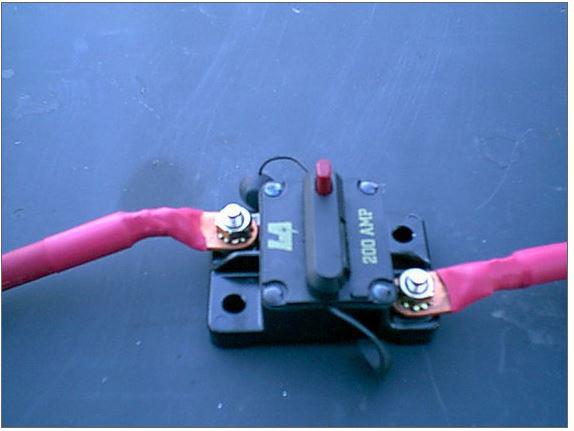
- A fuse (very important) you need a “mega-fuse” or circuit breaker at least 15A to 20A larger than the Alternator size (so 110A fuse for the 90A alternator or 150A fuse for the 130A alternator).
- You may need to change the Carburetor Electric Choke “cap”. If you have the old style that uses 7.5V from the 1G alternator stator terminal, you need to replace the choke cap with a 12V type and run a new 12V to it (more on this below).

Wiring for trucks with “Charge Warning Light” (not the in-dash Ammeter). Note that the Yellow wire from the Alternator “A” terminal is usually connected to the Alternator’s “Bat” terminal, and not routed back to the solenoid Bat terminal but either way is fine.
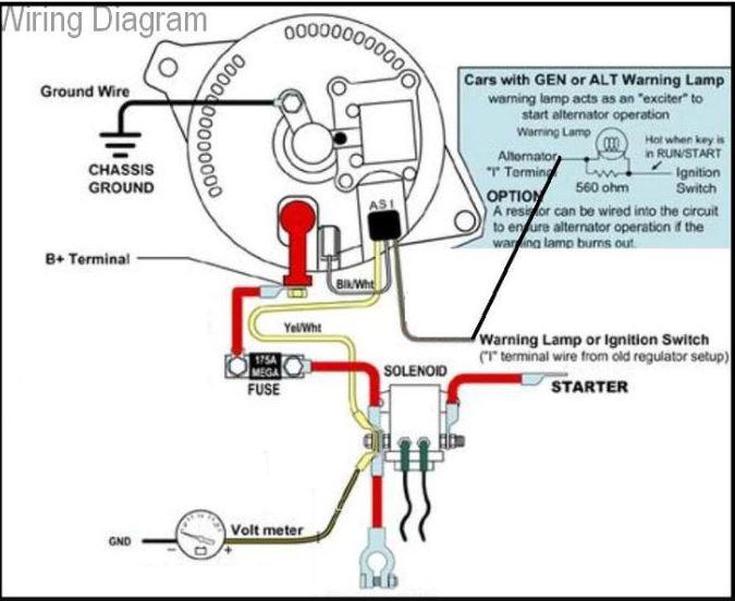
On the left, below, you can see the factory charge cable that you could get at the salvage when you get the alternator. But if you didn’t get the cable with the alternator, you can buy it. There are several companies making/selling these.


- A word on Clocking
BTW, the back of the alternator can be rotated (re-clocked) if needed, but it is reported that this job is best left to an alternator shop.
- IMPORTANT
If you want the factory gauge to work – it can be converted to a Voltmeter. There are threads on how to do this. Or you can buy one that is already converted for around $40. However it will still have “D” and “C” and not the actual voltage readings.
- 7.5 volt – Electric Choke modification:
If you have the style electric choke that uses 7.5V for heating, you can change this to the 12V choke cap. Once you replace the cap, you need to figure out where to get the 12V power from.
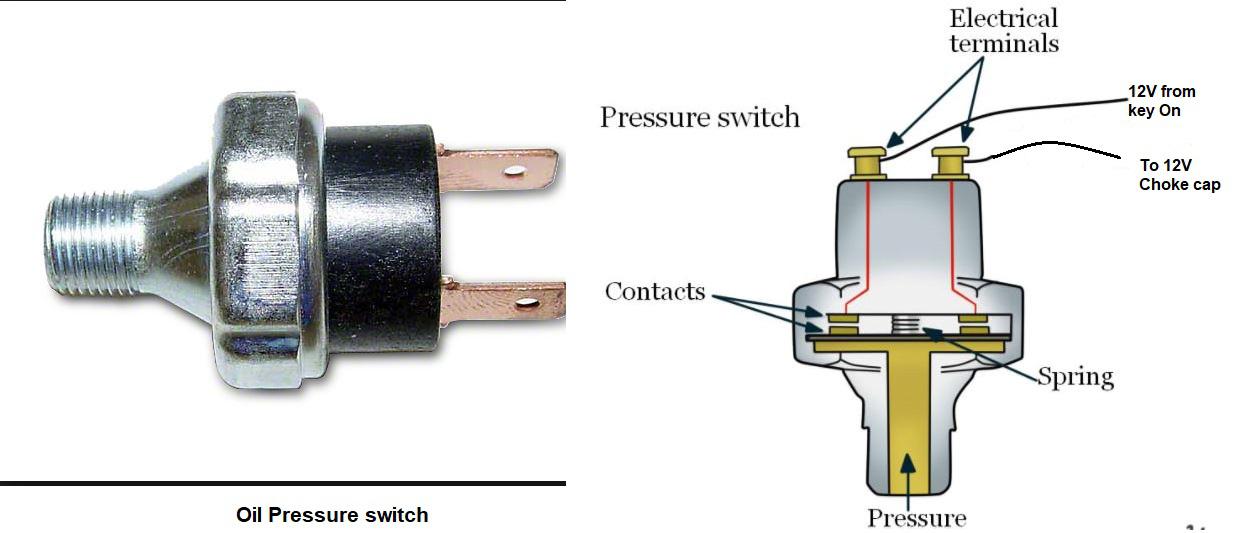
You don’t want “Key On” power because then the choke will be heating up with the key on (such as if your just listening to the radio). Ford used the alternator stator terminal because it was only hot with the engine running. The best thing to do is to add an “Oil Pressure Switch”. It’s a two terminal switch where the terminals are ”normally open” with no pressure and closed when oil pressure is present. Then you run “Key On” power to one side of the switch and the other side goes to the choke. This way the power only passes through the Oil Pressure Switch (don’t confuse this with an Oil Pressure Sender which is for the oil pressure gauge) with the engine is running (when you have oil pressure). The choke will only heat when the engine is running as designed. Holly and Ford both make this switch.
For Holley Choke Cap, p/n is 45-258.